Make a Comic

Use what you’ve learned about cartooning to create a mini-comic

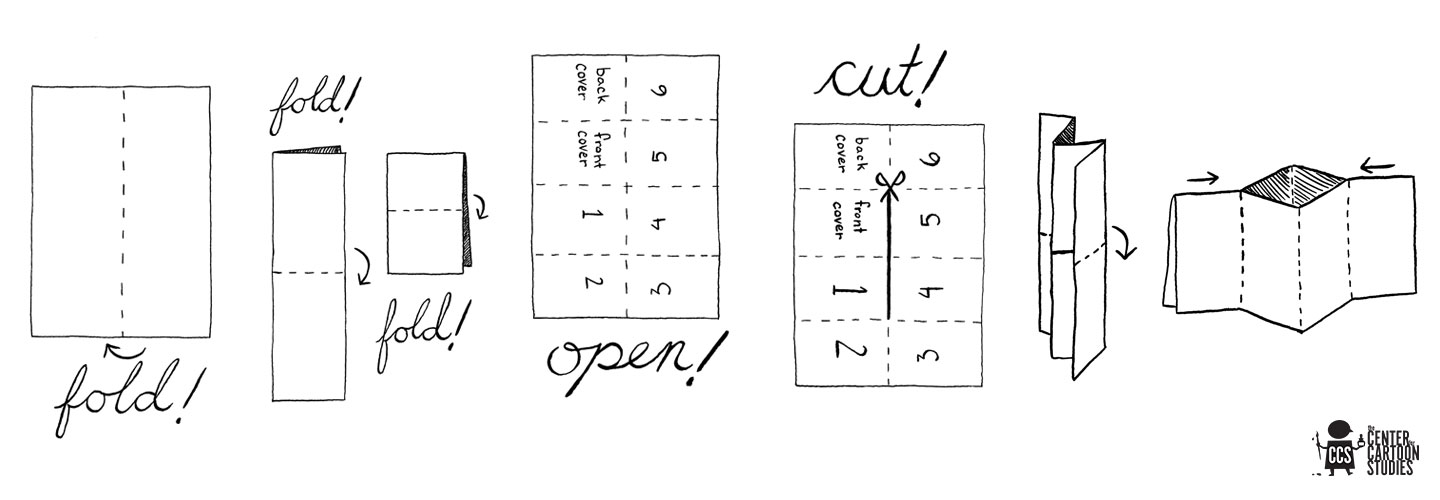
You’ve seen how cartoonists combine words and images to tell stories in sequence. Now use what you’ve learned to make your own mini-comic. 

STEP 1: Write Your Comic

Your mini-comic will be 8 pages, including the front and back covers. It should tell a story in sequence. You may include dialogue or make a silent comic without it. You might tell a story about your life, a funny joke, or a fantasy tale about talking animals, brave heros, or strange new creatures. Or, you might make an instructional comic to teach others a new skill. Sketch a storyboard for each page of your comic.

Tip: Show it, don’t say it. Let the pictures tell the story.

Abby began by drawing the front cover (see steps in the image above). She worked counter-clockwise to end at the back cover.

STEP 2: Create Your Comic Template

Follow the steps in the image at the top of this page to fold your sheet of paper into a mini-book.

Tip: Don’t forget to cut along the center line!

Jason created a silent comic and used his simple images to convey the action.

STEP 3: Draw Your Comic

Unfold your book. Follow the diagram in the image at the top of this page to draw the pages in the correct order. Be sure to orient your drawings so they are facing the correct way (follow how the numbers are written). It can help to lightly number your pages in pencil. Draw your comic in pencil first, then go over it in ink. You may also wish to add color with colored pencils, markers, or paint. When you’re done, refold your page and you’ll have a book!

Tip: You can photocopy your unfolded book to make copies for your friends!

Text-to-Speech